Showing posts with label Crimson Fists. Show all posts

Friday, April 9, 2010

40 Days of Painting: Tactical Squad

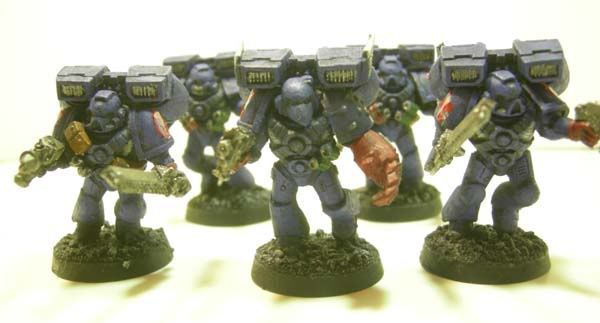
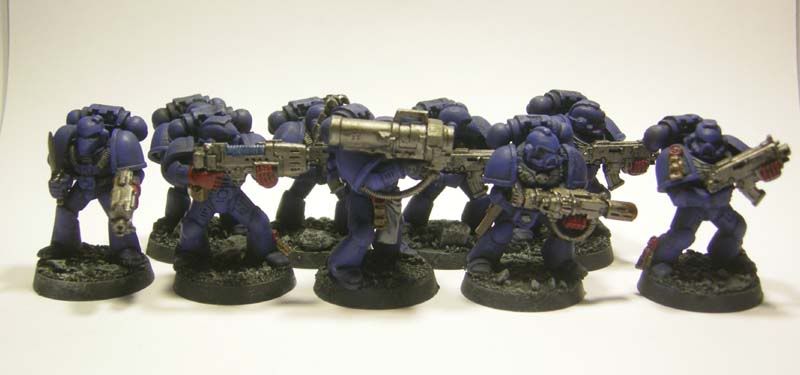
The original list for my 40 Days of Painting consisted of 2 Tactical Squads.  Well, I completed 1 of them so far here they are!
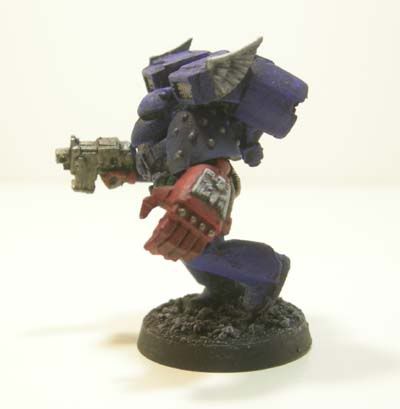
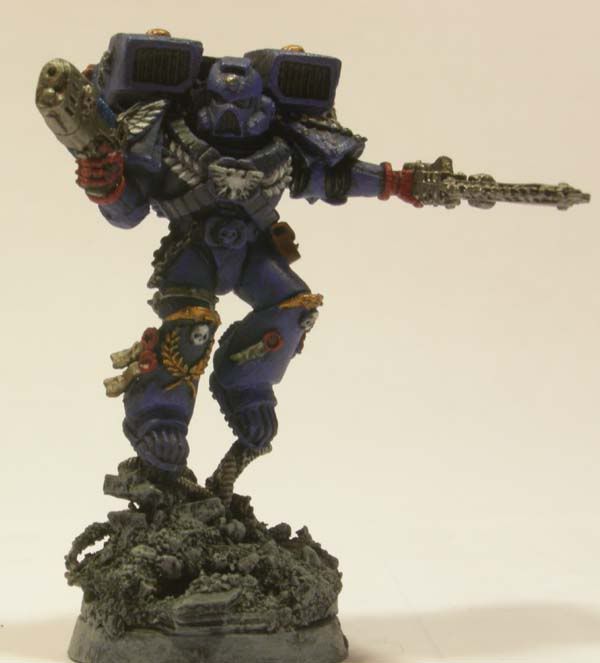
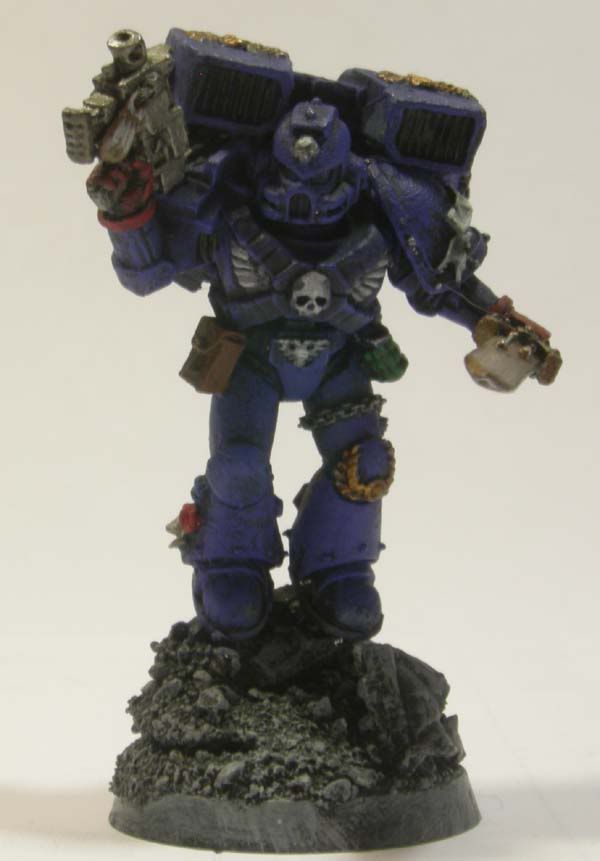
For the most part, this is a very simple tactical squad.  A few old metal models with new arms (though the guy with the knife and bolter has old arms...I wanted to make a model that looked like the old school Rogue Trader plastics).  The Plasma Rifle tactical has a very modest conversion...I attempted to raise up the plasma rifle so it looks like he's aiming it.  I used an old tutorial I found on Bolter and Chainsword that was pretty kick ass.

The lesson learned here is that not only for you need to adjust the wrists, you should also consider adjusting the joins at the shoulder.  He looks great from the front, but from the top, he looks like he's holding that plasma as far from his face as possible!

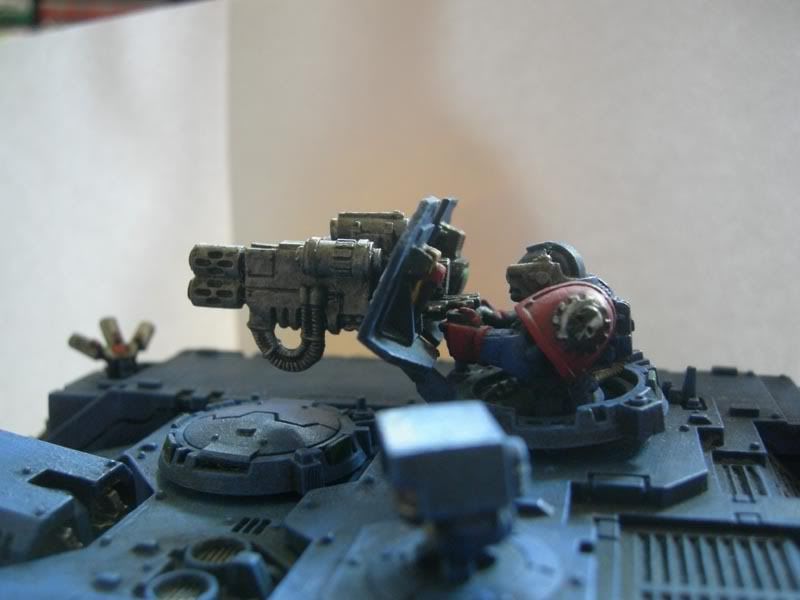
Oh noes!  Cawshis is cheating!  His tactical squad has a meltagun model as well.  No!  I'm not cheating.  I must have snapped this shot with the meltaguy instead of a tactical.  I'll make up for it with the other tactical squad in the contest, I guess!  The melta model is an older one, but I loved his face so much I highlighted it.

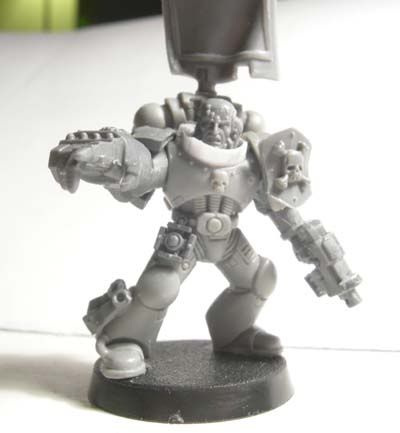
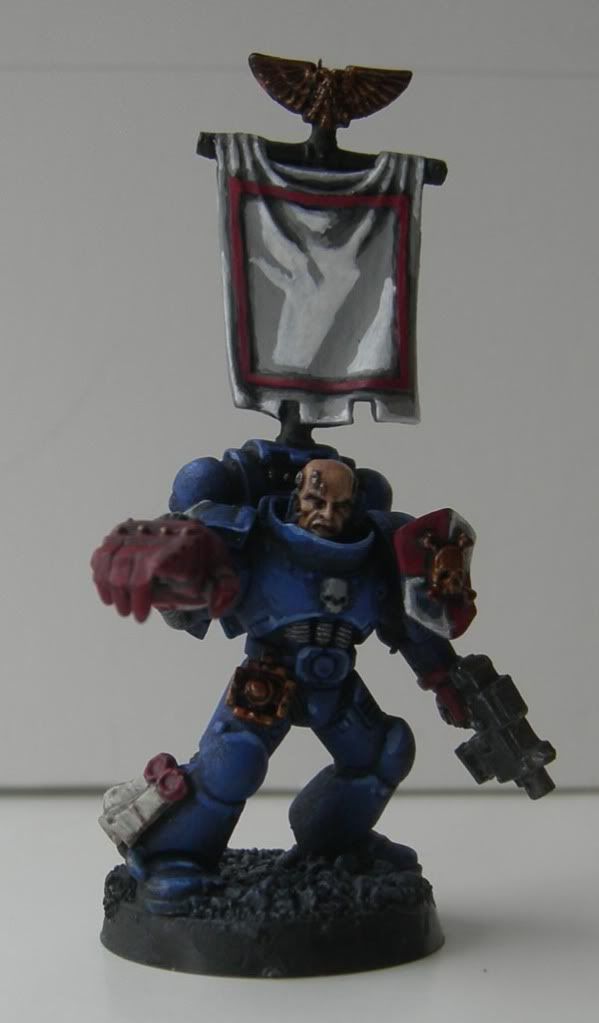
Lastly is my Tactical Sgt.  He's got a magnetized banner pole (for ease of storage and less chance of breaks).  At first I hated banners, but now I kind of want all my special marines to have one.
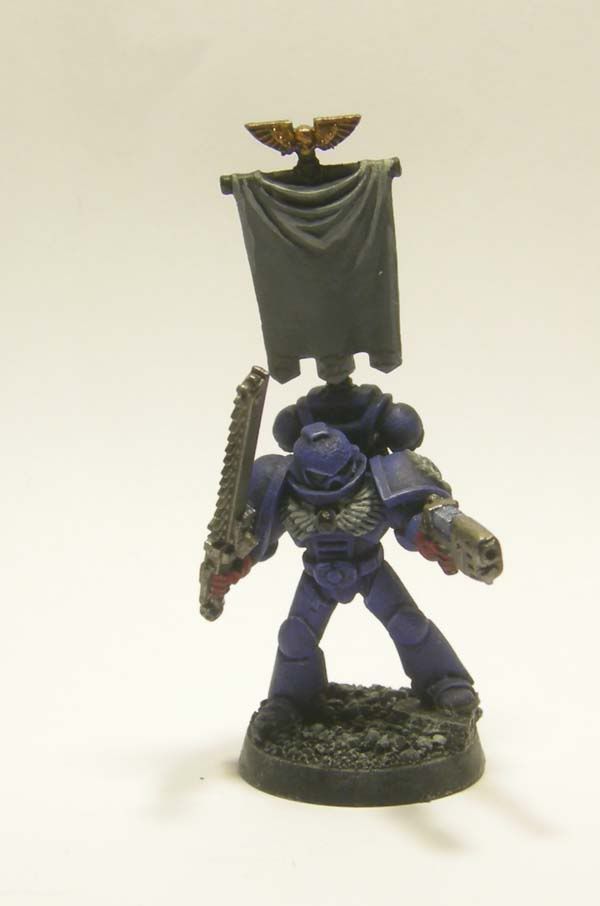
Another old model that I love and I'm so happy to finally have put a decent paintjob on.  He's got new weapons and a new plasma, but his helmet barely fits in his neckguard.  Awesome.

I'll be applying transfers next, but I'm going to wait until I get the microsol and apply in a huge batch.  More to come!  I hope folks enjoy these additions to the Crimson Fists!

40 Days of Painting Status Update:   
Less than 1 days left...31  points complete.  Still ahve to finish those tactical marines.  Might. Not. Make it.  Tomorrow we all get together for Kill Team games and paying of debts by losers and huzzahing (hating) on the winners.  I'm definitely going to finish these guys though, so expect pictures of the rhinos and the tacticals soon!

Thursday, April 8, 2010

40 Days of Painting: Captain

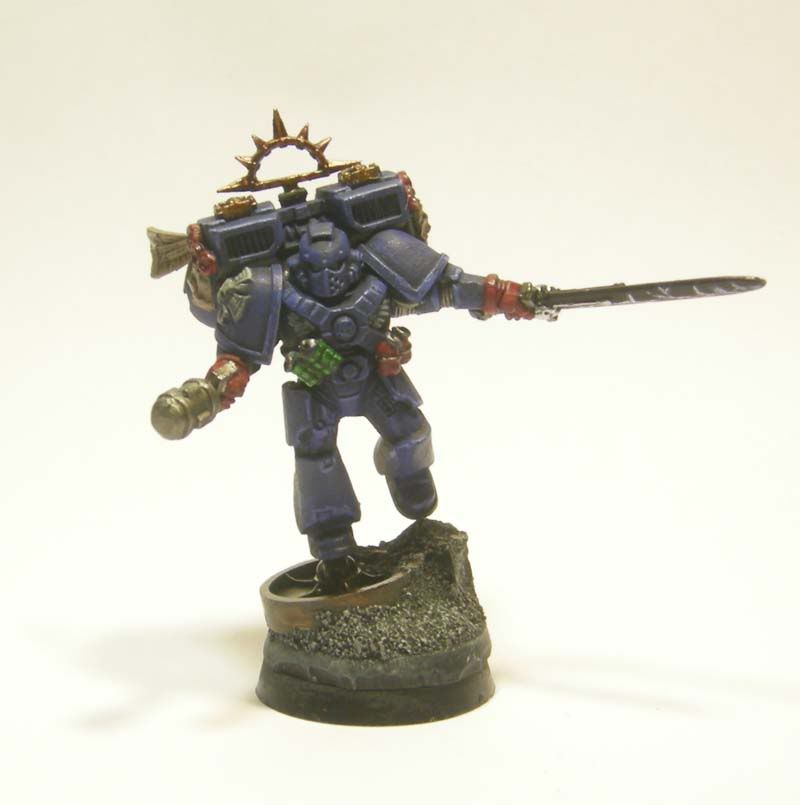
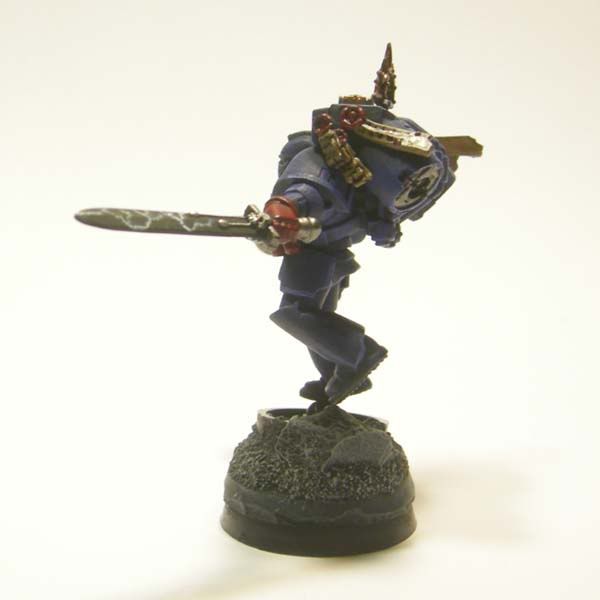
About 2 weeks ago, I posted pictures of a WIP Captain.  I figured now with only 2 days left in the original contest, I should get around to posting pictures of him.  It's shameful.  I know.

For the pictures this time, I set up 2 lamps and a white sheet of paper.  I might need a 3rd lamp or I may just break down and buy a picture box.  I don't know.  I can't seem to get these pictures looking as crisp as other folks have them!

As always, my Crimson Fists are a very simple paint scheme.  I take a bit more time and add a bit more highlights on my HQs and models I really like...but for the most part, it's drybrush Mordian Blue, a lighter drybrush of Ultramarine blue and then details and washes.  

I tried to get the power sword to look like the charges were flowing across it in motion (he's swinging the blade across his chest).  It looks good in person, but this is the only shot I got of it that looks decent.  I think my macro settings wash out the details.

I really enjoyed painting this guy and I can tell I've made leaps since my very first Captains of days past.  Although, looking at those old posts, I feel like my picture taking has gotten worse!  Coincidence?  Maybe I'm taking more time painting and less time taking pictures.  Yeah.  Or the lighting in here is awful!

40 Days of Painting Status Update:   
Less than 2 days left...31  points complete.  9 tacticals in two days.  I don't know if I can do it.  But I did paint up TLHB and TLLCs for make my rhinos Razorbacks.  That counts for something, right?  Right?  

Thursday, April 1, 2010

40 Days of Painting: Assault Squad

This past weekend I was at PAXeast.  So the week before, I was working like crazy so I could leave to a game convention without any guilt.  Instead, I transferred that guilt to not updating folks!

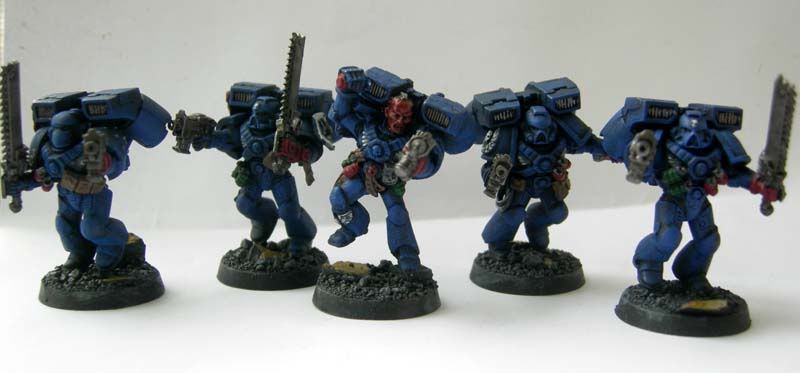
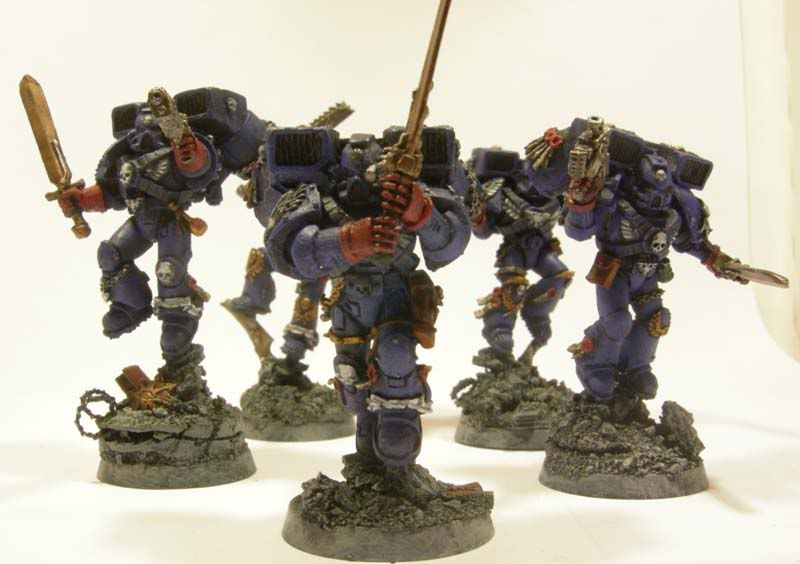
Anyways, I'm finally putting up some completed pics.  I finished this unit so long ago, it's silly it took me 3 weeks to post them.  Here is 5 Assault Squad members painted in your standard Crimson Fist colors.  Or nonstandard!  I wanted to see what a little drybrush of ultramarine blue did to the models.  Lightened them up a bit, but that's okay.


Flamer Assault squad member.  This is an older metal model (I have no idea from when!).  Even the Jump Pack is metal!  Lots of nifty details on this guy and I decided to paint his skin a darker color.  I wish the skin hadn't come out so shiny (I'm guessing that was from the washes), but I'm hoping when I get around to the finish, the skin will tone down.  Also, Hand Flamer!  I love hand flamers and I am very disappointed that only the new Blood Angels have access to them.

I'll save that rant for another day though.  Instead, more assault squadies!
Since I wanted to complete there guys as quickly as possible, I didn't do anything fancy here.  Bases are very straight forward and color scheme is very simple.  I may go back and do a few touch ups here and there (I don't really like the Black Templar badge for example), but these guys are tabletop ready!


40 Days of Painting Status Update:   
Less than 7 days left...20  points complete.  Have to highlight both rhinos and 10 tacticals in such a short amount of time.  Also, I need to paint all the bolters...so actually, I have only 10 points.  Damn you PAX! 

Wednesday, March 17, 2010

WIP Jump Pack Captain

note: This guy has been primed and painted already, but I wanted to show a WIP shot.
As I've become obsessed with Planetstrike games, I decided that I needed a Captain equipped with a Jump Pack to better support my assault/counter assault elements (both my 2000 points defender/attacker lists now have Jump Pack Marines).  I didn't want to spend a million points on him, so I gave him the basics:  Jump Pack, Power Weapon and a Melta Bomb.

Some very minor conversions went into this guy:  I cut down the hip plates from a Terminator Assault set and had to place a spacer on his Jump pack to fit in the Iron Halo.  If I do the hip plates again (and I will as I kind of like them!), I'll probably fit in some sort of spacer to lift them up slightly from the armor.  They look a bit off...or that could just be me.

I heavily decorated the Jump Pack as I wanted the Captain to be able to fit in with the bling-laden Vanguard and still stand out.  I think the seals and base will help in that regard. The base I received in a trade via Santa Cruz Warhammer Barter Bucket. I traded my OOP Imperial Guard along with an Imperial Guard on a bike for metal scouts, and Mike was awesome enough to toss in a few resin bases. It adds a great amount of height to the Captain and will be fun to paint I think.

I'm pretty sure the seals were from the Ravenwing set.  I love that set just for the seals! On the top of the jump pack, I wanted to add some more bling (pimp my jump pack!), so I shaved down a pair of matching Terminator honors bits as far as I could manage and glued them on.  If I had more skill (and time) to work with green stuff, I'd probably had been better served going that route.  But I'm happy with the way it turned out.

I wish my pics weren't so dark.  Taking pics while working isn't easy.  Do you folks have a photobox set up that is quick to turnaround?  Often, I'm snapping a pic under a lamp and trying my best to clean it up on Photoshop (my skills there a limited as well). My challenge is that I live in a NYC apartment that has nearly no space to permanently set up a photobox/lamp set up...so I make do with my work lamp on the coffee table so I can get something up.  Perhaps it's a setting on the camera I can fiddle with...is there any setting that'll take brighter pictures despite crappy lighting?

Coming up:  Finished Captain, Basing 101 and a 10 man Assault Squad!

Sunday, March 14, 2010

Basing: Not Another Tutorial Part 1


There are probably hundreds, if not thousands, of basing tutorials on the web.  Ron, over at From the Warp, has probably the simplest tutorial out there...add glue to base, dip in sand!  Weemen extends Ron's 2 steps out to 10 in an easy to read and follow fashion.  The talented folks over at Santa Cruz Warhammer not only expanded on Ron's simple format, they also introduced grass and a self-made nifty wash to it.

So, as I say in the title...this is not another tutorial.  More talented folks have created tutorials for you to follow and use. In that linked post from Santa Cruz, they had a contest at the end that involved them sending some basing materials to a lucky winners.  The only requirements...write a quick review.  I sent John my review ages ago, but I still owned the blog a review. Here it is in the simplest and easiest form...and just in time for 40 Days of Painting!

First up, superglue a rock to the base...Santa Cruz (SC)'s kit came with a bin of slate that was perfect for my bases. Glue it anywhere you think it looks nifty. Don't over think it!  Only warning:  Try not to make it impossible to paint the model's feet!


Second up, add white glue.  I just put 2-3 drops on the base and use a toothpick to spread around.  Third, dip in your sand mixture.  In the past I used a gravel-like mix for my models.  Santa Cruz sent me a nice sandy mixture...it's the same mix they used in their tutorial.  It sticks quick and then I just let it dry overnight.


Prime it!  I prime my models using Gesso.  I never liked the spray paints despite the speed and living in an apartment building makes it tough to "go outside" and spray.  Besides that, priming with gesso allows me to really look at my models and mentally take note of all those details I may not have noticed before.  Hand-priming, for me, has really improved my painting habits.  Here's a pic of the brand I use.

I use one brush for the base and different one for the model when priming.  I've learned through trial and error that using the same brush means you get a bit of base material stuck to your model and that you'll need to remove the gunk later...learn from my failures! 

I then leave this to dry overnight! Stay tuned for the painting steps I take in part 2!
40 Days of Painting Status Update:   
26 days left...9 points complete.  That's 6 Sternguard, 5 Assault Marines and 1 Captain.  I think I'm going to do Rhinoes next just to increase my score to respectable levels.  Low hanging Fruit FTW!

Saturday, March 13, 2010

40 Days of Painting: Sternguard

Finally putting up some pics!  With 12 days past, I'm sad to admit that I only have 8 points fully painted...the Sternguard ate up a lot more of my time than I'd like to admit.  But hopefully I can make up time on the easier Tactical Marines and Rhinos!

I originally posted regarding my Sternguard a really long time ago. Back then, I had 4 of the splendid metal models to paint and 2 converted models.  I primed them and basecoated them a long time ago and then got lazy for a bit. No more, I say!  No More!

Being the obsessive guy that I am, I couldn't paint them with their bolters blocking all that chest detail, so while they are WIP, the arms are painted separately!  I didn't take a shot prior to this, but from here I had a bunch of steps...lots of details to cover (especially the bling) and highlights to add.

As I post these pics, I can see I missed a tiny detail here and there that I'll need to go back and finish up.  And I may consider highlighting the bling some more as they don't so much look "Shining Gold" as "Dull Brass" at the moment.  Any veteran out there knows what colors I used.  I like my crimson fist bolters to look all metal...as they would need to be cast quick and efficiently to rearm the chapter.  Also, these guys are all about table-ready...so it saves me lots of time considering how many marines I'll have equipped with bolters!

The converted marines are fairly easy to spot, I think.  They do fit in well with the rest of the sternguard, but I think for future converts, I'm going to ensure they have bolter straps and maybe a bit more bling.  And Skulls on their helmets!  I didn't notice that nearly all of the metal sterns have skulls on their helmets.

I'll be posting more as I go.  Lots of pictures...but lots more painting to do!  If it wasn't for the last minute, I'd never get anything done

40 Days of Painting Status Update:   
28 days left...8 points complete.  I'm way behind where I need to be!.

Tuesday, March 2, 2010

40 Days of Painting: Random Thoughts

So without realizing it, the minis I pulled off the shelf for this contest could totally amount to a modest 1030 point army!

HQ (300 Points)
Captain with Jump Pack, Power Sword, Meltabomb
Captain with Terminator Armor and ChainFist

Elite (155 points)
6 Sternguard, 1 Combi-Melta

Troops (465 points)
10 Tacticals, Powerfist, Meltagun, Missile Launcher, Rhino
10 Tacticals, Plasma Pistol, Plasma Gun, Heavy Bolter, Rhino

Fast Attack (110 Points)
5 Assault Marines with Jump Pack, Flamer

It isn't the worst list in the world for a 1000 point game.  A solid Troop core with an ability to tackle various unit types (Plasma on the MEQs, HB on swarms...Power Fist for Dreads) loaded in Rhinos and supported by 2 ICs and a Jump squad.  I guess I'd march that Terminator Captain around the board as he'll be the slowest model out there...or use him as a counter-assaulter to support a HB or ML combat squad.

The Jump Pack Captain will support the Jump Pack marines and break up small enemy units or last-turn objective contest.  I feel like the list is a bit naked without some sort of tank, like the cheap predator...but I wouldn't be adverse to playing with this list.

Might even be fun in a Planetstrike game as the defenders!

How do you decide what you're going to paint?  Is it what tickles your fancy?  Is it that neat conversion that you just have to paint?  Or do you paint in blocks of required units?  I usually paint in blocks of units I want to try out.  This time around I just grabbed what I had assembled just to finally get them done.  We'll see how that works out for me.  I have a lot of other minis I should "just get done..." many of which you've seen right here on this blog (Dark Angels, Tau, etc!).

What do you have on your shelf that you just need to get done but you haven't been inspired to pull down and paint?

40 Days of Painting Status Update:   
39 days left...all models are now primed and ready for base work.

Monday, March 1, 2010

I'm back and 40 days of Painting ahead!

So after a too long hiatus, I'm back. I could post a litany of excuses...work, life, laziness, etc...but suffice it to say, I've missed posting and been aching to get back to it.

Over at NerdNYC, I've entered into a "contest" of sorts.  We're all putting some money in a pot and the challenge is simple:  40 points worth of minis in 40 days.  I have lots of minis just sitting on the shelf, assembled and unpainted, so I pulled a bunch down and I've decided to get these done!

 Thirteen points:  2 Rhinos (5 each) and 6 Sternguard at 1/2 point each (since I've already started them).


Twenty-seven points. 5 Assault marines...one of which is a very old assault marine equipped with a very old hand flamer (which is simply a flamer in play).  Terminator with Chainfist and 20 Tactical Marines.  A lot of these guys are older Metal models with newer arms and bolters (though some have old bolters too!).  I really emptied my "old bits" box to assemble these guys and I'm happy with how they turned out. Lastly, I made a Jump-Pack equipped Captain using various bits from various sets.  He's been put on a resin (I think!) base I received in a trade not long ago.  I wanted this Captain to stand out a bit and also be about the same height as my Vanguard and the resin base was perfect for it.

I made some minor conversions here and there and I'll try to highlight them in the future as I paint up the models. I'm excited to be back painting and modeling again!  Stay tuned (for more regular posting!).

Wednesday, November 11, 2009

WIP: Crimson Fist Ironclad Dreadnaught


For my Planetstrike game on 11/14, I've decided to field an Ironclad Dreadnaught in a drop pod.  I've been using a regular AoBR dreadnaught proxy in games and I've really liked the Ironclad's performance so far.  Slightly better than a standard dread and well worth the extra points.

I have the Ironclad set from GW, but decided to also kitbash up my own dread.  After trolling various websites for inspiration, I came across an amazing model on Cool Mini or Not by Talarion.  I loved the head piece and the bulky bunker-like look of the model.  So I grabbed my bits and saw and knives and sticky tack and decided to give this conversion a try for my Crimson Fists!

The Dreadnaught shape, of course, is an AoBR model I picked up from The War Store.  I then sawed off most of the front of the model (after much dry fitting and determining best fit and the like).  I haven't glued on the front plate yet as I need to figure out what I want to do with any gaps, but so far, so good.


I used some old LR sponsoon bits (from my LRC) to form the front plate, cutting and fitting as needed.  For the head-lens array, I used a Chaos smoke launcher (at least I think it's a smoke launcher), much like the original inspiration.  Plasticard forms the helmet as well as the armor plate on the model (I don't know why I have black plasticard instead of white...the bag I bought had a large mix of colors and textures).  For the Chainfist, I used an old Epic Titan arm and a plastic tube tacked onto the AoBR arm.


I'm going to detail it up with some pipes and wires and the like.  And the pic makes it clear that I need to smooth out that arm immensely!

For the HK missile, I didn't really like the ones the Ironclad comes with.  It really doesn't makes sense to me that the HKs on Rhinos look so different from the ones on Ironclads, so I just took a normal Rhino HK and cut it down to fit under the dreadnaught.

Lots more to do:
Bulk out the legs with some more armor plates and detail.  Bulk out the body and arms as well...I'm not completely sure about the exhausts on the front...I like it but I don't know if it'll look good painted. And I haven't even touched the back engine!  I also need to assemble the other arm and add in the melta gun/flamer options. 

What do folks think?  Any advice?  I've got a ways to go yet and I may wind up proxying my Ironclad again on 11/14 if this beast isn't done yet.  For fluffy reasons, I'm saying that Pedro Kantor had to reactivate some of the older dreadnaughts after the disaster on Rynn's World…the loss of their armory has left the Fists using whatever they have on hand!

Tuesday, November 3, 2009

Crimson Fist Veteran Sgt

I finally finished my Crimson Fist Sgt.  I originally planned his construction and look for my Command Squad I posted ages ago.  I didn't think it would take so long to paint him at the time (I even tried to get him done by the end of May...but work conspired against me!).  Anyways, I finally completed him!  For the too lazy to click on my link, here's the pic of the Sgt pre-paint job.  Bits from various sets and I used cuts from index card to make the neck armor.  To harden the card, I brushed on a light layer of crazy glue.  Really stiffened it up!


For painting him, I used my standard Crimson Fist colors:
Mordian Blue Drybrush over Black Gesso
Ultramarine+Mordian drybrush to highlight
Straight Ultramarine for highlight.
Extreme highlight = Ultramarine+White
Mecharite Red Fists w/ Badab Black Wash in recesses/Baal Red wash on higher parts.


I quartered the shoulder icon...I'm going to have a few units with this quartered icon somewhere on them to represent their having fought with Black Templars. I plan to have a green half badge on my Sternguard to represent veterans of Rynn's World. I know the Fists don't cotton to elaborate badges and icons, so I'm hoping to keep it simple.

I'm gathering up the courage to try and freehand a design on the Banner, though in looking at this picture, I think I might have to clean up the highlight/lowlight colors. It's pretty stark how fast it goes from white-grey-dark grey! I also forgot to detail up the Purity Seals. Tiny things you don't see until you actually post the picture!

Saturday, October 31, 2009

FTW: Must Have Unit


From the Warp asked us a simple question:
"This time it's an easy one... What is your MUST HAVE unit in your army?...We all have that one unit we just can't bear to go without... For some of us it's an emotional attachment, some might just think it's cool, whatever the reason, let's hear about it."
For me, at least, Ron's right...his question is an easy one. The must have unit for my Crimson Fists are Assault Marines with Jump Packs.  Simply put, Assault Marines are cheap for what they can do!

For less than 150 points, I can field a squad of 5 Fists that can hop 12inches over terrain, flamer an enemy unit and then charge in with Power Fist attacks!  Toss in a melta bomb for the Sgt and even a Land Raider is in danger. 

Crimson Fists Assault Squad Support Termies in Killing Nurgle Marines

They aren't invincible by any means and 5 marines with Packs won't break an Ork mob, but I always field them and every game they've managed to do something awesome.  Be it having a Sgt that crushes 8 Skull Bashers in a single battle or a late turn revenge charge against a Land Raider to blow it up, the Assault Marines are mobile enough and flexible enough to be where I want them, when I want them!


I'd be remiss if I didn't at least mention the neat conversions you can do with Assault Marines.  I've seen amazing jump packs, cool bases and neat motion effects.  I also love the fluff that some folks have created for their Assault Marines.  For AaronB (the occasional guest author), he decided that all his Jump Marines have Beakie helms and prefer axes over chainswords.  His Sgts take Thunder Hammers instead of Power Fists...since they bash skulls so well!

Tuesday, October 27, 2009

Planetstrike: Crimson Fist Attacker Edition


Are folks out there playing the Planetstrike? I'm not seeing as much buzz around it...though I guess much discussion time was swallowed by the Jaws of the Wolf and Tyranid rumours. In a few weeks, I'm having some friends over to play Planetstrike on my new table and I'm in the process of finalizing 2 lists...depending on who plays attacker and who plays defender.

Here's my thoughts on an 1850 Invasion Force (Sword of Dorn Formation):
Wave 1:
Librarian Epistolary (Force Axe, Bolt Pistol)

Sternguard, Combi-Melta, Power Fist
Land Raider Crusader

Wave 2:
Ironclad Dreadnaught SH+CCW+Melta w/ Drop Pod+Beacon
10 Tacticals w/ Meltagun, ML, Power Fist, Drop Pod+Beacon
10 Tacticals w/ Meltagun, ML, Drop Pod+Beacon

Wave 3:
5 Terminators w/ Chainfist
Captain w/ Jump Pack, Power Sword, Melta Bomb
5 Assault Marines w/ Powerfist, Flamer, Melta Bomb
5 Scouts w/ Melta Bomb w/ Landspeeder Storm+Multimelta

The Sword of Dorn is all about hitting hard, fast and often! The Librarian is fielded with the Sternguard inside the Crusader. This gives me a solid core of shock troops that can hopefully burst through a line. I haven't decided on the powers for my Librarian yet, but most likely it'll be assaulty-powers and maybe the Gate. I chose an LRC over a Redeemer as that's what I have built and painted. I doubt I'll get the Redeemer done by the game. Next time though!

The Drop Pods will drop in a good sized cluster or spread out depending on the terrain set up with the Tacticals devoted to busting up vehicles or bastions. Once they are situated, the squads will then provide fire support for the next wave of assault elements: Jump Packers and Terminators. With all the power fists and meltas, I'm thinking Bastions aren't going to last long and any vehicles still around are going to get devastated. The Jump Packers and Storm also have the added benefit of being able to seize objectives on the last turn if needed. Though I'm hoping my Tacticals can hold enough objectives or the enemy has been routed!

With Planetstrike allowing assaults after Deep Strike, I'm figuring I'll have pretty much all my troops deep striking and then use the beacons to guide them in for the kill. For folks who've argued rules, I wonder how they feel about Drop Pod assaults or Landspeeder Storm assaults…my opinion is that the "deep strike" ability of the transports are conferred to the units within. So if I wanted, my Tacticals could assault after a deep strike. But that might be pushing it (and also unbalancing for the defenders maybe?). We'll see how it plays out in play.

What do folks think?

Saturday, October 24, 2009

Crimson Fist Land Raider

Finally going to put up some pics of my Land Raider Crusader. This is the older Mark I model...with the metal hurricane bolters. Let me tell you...they were a pain in the butt to assemble. It's fairly standard Crimson Fist colors and not much detail. Unfortunately, many of the transfers I applied came off in transit...so I need to reapply (and get some of the Microsol suggested earlier). I've been practicing my freehand...but it still looks a bit unrefined, so I'll be continuing to use transfers until I can get the Crimson Fist to look nifty.

Can't really see here, but I did paint the interior. More drybrushed the interior up from black to a dirty-white color. I hoped using a lighter color would make it easier to see inside, but you really can't see. I did magnetize the door so it would seal shut when I closed it. I didn't like how it was always partly-open on the battlefield. Brother Whinicus would probably complain about the breeze blowing up his Terminator skirt or something. It opens and shuts now with a satisfying snap! For the Fists to rebuild, every Marine has to be a Fist first and Machine-God acolyte second! To reflect this, all my Crimson Fist Adeptus Mechanicus marines will be sporting the Fists colors and only their shoulderpad will have the Mechanicus colors. In this marine's case, he's working the Meltagun. Love that Multi-melta...especially with the Machine Spirit rules allowing it to shoot pretty much no matter how much I move.
I love the Crusader and it has seen combat against Eldar, Orks and Marine with great effect. Not only does it absorb an absurd amount of shots, it carries my Fists right into the thick of it fairly safely. For my upcoming planetstrike battle, I'm going to stuff it full of a Command Squad and a Librarian on the defense as a counterassault force and with Sternguard for an Attacker Force. Planetstrike post coming soon!
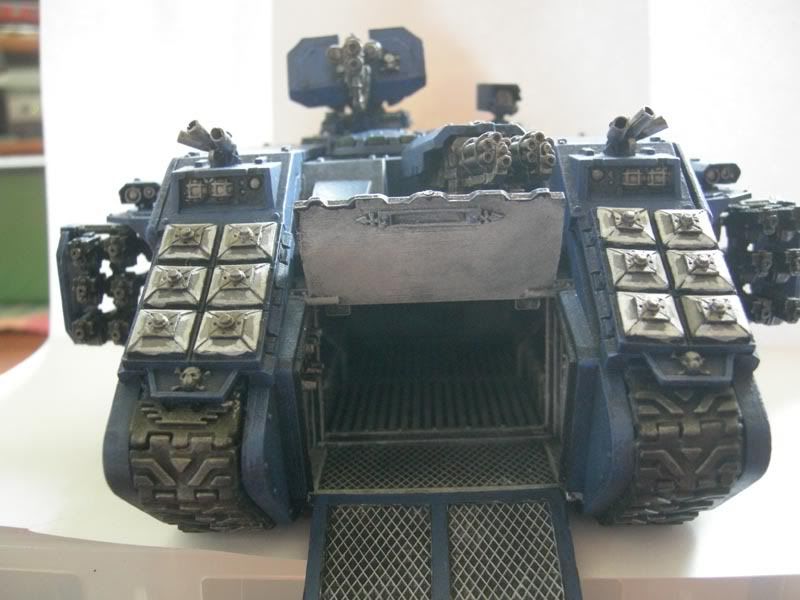
Eventually, I'm going to name her (taking suggestions...should be Spanish-esque!) and add in more banners, but for now she's battle ready!

Wednesday, October 21, 2009

Crimson Fist Librarian

With the weather getting colder in NY, I'm back to being inside and painting. I guess from now on, I should let folks know I might not post much in the summer. Something about that weather makes me not want to sit in front of a computer updating my blog or in front of models. You'd think with more sunlight, I'd want to paint more by natural light, but it just never happened!

I'm back in the saddle though and preparing for my first Planetstrike game (post to come). I've got bastions to build and a few Crimson Fists to assemble and prepare for the fight. With the release of the Space Wolves codex and the amount of psychic powers my local opponents have the potential to play, I've decided that my Crimson Fists need a Librarian to keep things honest. Plus it was about time I get around to painting another HQ model for my Fists!

Click for larger version

This is an older model, though I don't think he's more than a few years old. He's not available from GW catalogue anymore, but he's in the How to Paint Space Marines book. I liked him cause of the book strapped to his armor. I decided that my Crimson Fist librarians take the red fists (on both to denote veteran) and use red for the distinctive horned skull.

My Crimson Fists work as my table-ready army with experimenting…mainly cause I spend so much time on my Dark Angels. I wanted a "Vanilla" marine army that could get on the table relatively fast and didn't frighten me when it comes to painting. So I usually skimp on the work and details. No mixing too many paints, and no agonizing over color choices. I make a list and don't really deviate.

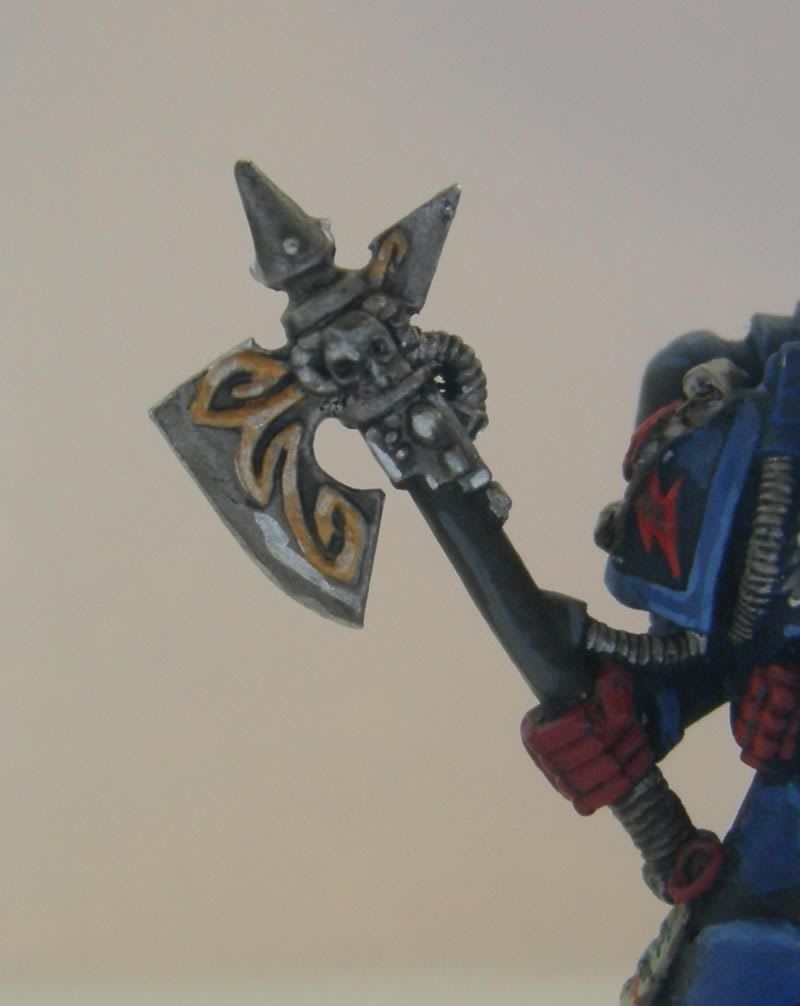
Here's detail on the Force Axe which I was fairly proud of. Previously, I tried the Sepia wash on power swords for my Vanguard, but the more I look at them, the more I think they look lazy rather than awesome. A Librarian's Force Weapon should look a little different and ancient anyway, so I tried something different (And yet...entirely by the book!). I'm considering giving the metal a wash of sepia just to make it look slightly more ancient, but I'm digging the gold detail.

For the hood/helm, I went all out, painting individual wires and highlighting them up from black primer. Camo Green, Blood Red and Sunburst Yellow were my final highlights. I'm beginning to feel much more comfortable with my highlight work. I think I might try some new techniques on future models as I have my Fists down to a science. I completed this Librarian in about 8 hours…all while watching movies (Embarassingly: Conan the Barbarian, Red Sonja, The Woods and People Under the Stairs) at the same time. Prolly could go much faster on the next one if I didn't watch tv!

Wednesday, July 1, 2009

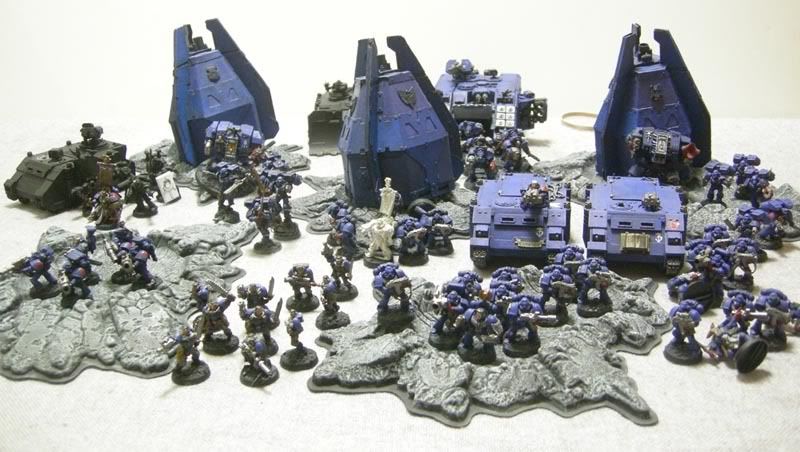
3000 pts of Crimson Fists (and a review)


3000 Points of Crimson Fists!

As I've mentioned before, I've been prepping and building my Tau army for an Apocalypse game in July with my nerd friends, but that doesn't mean my Crimson Fists have gone unloved. I'll be bringing them to the game to field on a different table for a friend to play. So today I went through the task of packing them all for travel.

Which brings me to my review! The Sabol Army Transport Mark II has been my transport of choice for nearly all my games in the last two years. I love the rear loader and the large capacity in the small bag! I can fit this entire army into the transport with room to spare for a codex, rulebook and other accesories of 40k gaming!


Filled Bag

Here is the troop all packed up and ready to go (once I close it). I don't have the pods in any tray as there is no tray large enough for my DIY pods. I also had to creatively pack the vanguard and a few marines into the 3inch tray with my rhinos....but it all fits!


Closed Bag

I recommend the Sabol Transport Mark II. It's awesome!

Wednesday, April 22, 2009

April Update and Army List for Saturday

Both work and inertia have conspired against me to make the April Challenge goal truly a challenge! With only 7 full days and a single (packed) weekend left, it's going to be tough to get it all done! Last night, I flocked and primed my Command squad, Sternguard and Pedro Kantor. One amazing thing about using gesso is the speed with which I can prime my models. Before, when I used to spray-prime, I'd force myself to wait until I had 30+models or lots of vehicles to spray…it made crawling out onto the (apartment) fire escape and angering the wife worth it. Now I can prime as soon as the flock is dry! If only it were this easy to get the painting done.

I have a game coming up this Saturday against Falgrim's DIY marines, "The Sigmar's Pride." They are modeled after the Space Wolves (instead using lions) but are using the SM:Codex at the moment. So it'll be a straight SM v SM codex fight @ 1750 points.

Here's the list I'm planning (and it makes me so happy they are all painted…if not quite WYSIWYG!) @ exactly 1750 points:
HQ: Captain in Termie Armor
Elites: 5 Tactical Terminators w/ Assault Cannon
Elites: 1 Dreadnaught w/ Drop Pod, Locator Beacon
Troops: 10 Tacticals, Melta, LasCan, Power Fist, Rhino
Fst Att: 5 Vanguard Marines w/ Jump Packs, 2 Power Wpns, 2 Plas Pistols, Relic Blade
Hvy Sup: Land Raider Crusader
Hvy Sup: 5 Devastators w/ 2 PlasCan

The dreadnaughts, LRC and Rhinos w/ Tacticals make up the fast moving bulk of my attack force. Since 1 dread can deep strike in the first turn, the hope is that I can land, pop something large in the rear armor (like a vindicator or land raider with the MM) and then divert some marines to deal with him (though dreads do pop easy!). My LRC w/ termies will advance on any objective/easy kp supported by the tacticals in rhinos…in case any speeders or bikes with meltas show up. The Devs are there to (hopefully) pop rhinos or break up marine formations (plasma is nasty!). Finally the Vanguard can work as either an anti-assault force or a final objective contester. With the 2 locator beacons, I'm hoping that a Heroic Intervention isn't impossible. Being able to deep strike and then charge would be awesome (though I haven't had much luck with the Vanguard so far…costs as much as termies…die much faster! Nifty models though!).

Any thoughts? I don't have much time to build any new models, but I have a vindicator, razorback, command squad and the SG/Kantor models primed. Also a lot of Dark Angels…since I don't mind fielding a mixed list as long as they are all marines. Any suggestions?

Depending on how I do, this is probably my last game with the Crimson Fists for a little while. I've been meaning to get back into my Tau and with an apocalypse game planned for July, I think now is the best time! Expect more posts on the Apocalypse planning in May once the April Challenge is up. I also plan on starting up a May Challenge as well!

Saturday, April 18, 2009

Crimson Fist Vanguard


Big progress this week! With only 10 days left in April, I have a pathetic 15/67 points completed. But I'm not giving up! I finished my LRC (pics to come) today and my Vanguard. My Vindicator, Razorback and Sternguard have been assembled along with my Command Squad and Kantor.

That means I have 32 points ready for undercoating and 20 points (Drop Pods) ready for detailing. I don't know what's blocking me from just finishing those damn pods, but I'm determined to get them done this week!

Back to the Vanguard, I went a little crazy detailing the bases as I wanted them to be taller than the average model. I used cork to build up the height of the base and tossed in some bits to get it nice and rubble-ly. The Vanguard are neat in that they also have their own bits on the metal bases! As these are my Crimson Fists, these guys are all about getting them ready for the tabletop. They're also about trying out new techniques I see online. It's going to make for a healthy variation, but I think that's okay. The Chapter is rebuilding, right? Only makes sense that the servitors assigned to painting the marine armor get better too!

For my two power weapon equipped VG, I tried the Painting Corps tip of using Sepia wash on bolt-gun metal to get a nice Ancient-Gold color. I figured I'd give it a try! I like the ancient gold look, but I don't know if it's the best look for marine weapons. Or is it? I can't decide really, but at least my Vanguard will be consistently geared with ancient power-swords!

I'll try and get up my LRC next. My friends and I are trying to put together an apocalypse game in July, so instead of taking pictures today, I tried building a massive power station with Orbital gun piece of terrain. It's way-too WIP to post, but I'll put up those pics later. I think May-June are looking like "Prepare for Apocalypse" months. Which is good! I need a distraction from the Imperial Guard overpowered codex (I flipped though it at my FLGS. Madness!)!

Thanks for looking!

Thursday, April 9, 2009

April Challenge: Nearly half over.

With 14 days passed, I thought I'd update interested parties on where I stand. I recently added a color-coded list to my sidebar to keep track of what I'm working on and what I have left to do for April. I maintain the list in Excel normally so that I can review it when ever I paint (I'm a nerd, I know!).

At this point, I have finished the Vanguard and working on detailing up the LRC. I apologize for the lack of pictures, but I haven't had a chance to snap any yet. Busy work week and taking the time to snap a pic seems crazy when I need to paint!

I'll have to admit to being slightly behind where I thought I'd be and a lot of that has to do with being lazy. Many a night instead of painting, I'll watch tv or play World of Warcraft. I'd like to blame work, but I've only worked late a few nights. I'm going to need to step it up if I hope to get 57 painting points this month!

Here's my new battle plan:
Finish Painting LRC
Finish Painting Drop Pods
Flock/Undercoat Command Squad
Paint Command Squad
Assemble Vindicator/Razorback
Undercoat Vindicator/Razorback
Paint Vindicator/Razorback
Assemble Sternguard/Pedro Kantor
Flock/Undercoat Sternguard/Pedro
Paint Sternguard/Pedro

I think knocking out the LRC and the Drop Pods will keep me feeling good about painting (since I'm actually getting this done!). Then moving on to the command squad. I like the rhythm of painting 5-10 troopers then doing a vehicle or two. Then back. I think it prevents me from getting overwhelmed by all the troopers I have waiting for me!

Eek, over at Heroes of Armageddon, created an awesome chart to help track his progress on his Salamander Battle Company. I may have to figure out a way to steal it and post it in the side bar instead of my lame color-coded text box. It's pretty damn cool, so check it out.

Painting List and April Challenge Progress

A quick picture-less update.

I've assembled and primed my Crimson Fist Vanguard marines. With these marines, I didn't convert anything, they are straight out of the box as I find converting metal models to usually be kind of intimidating. All the packs and arms are pinned and in the case of the relic-blade equipped marine, I left the arm off until I can get the face painted. I built up somewhat excessive bases (pics to come, I promise), but I couldn't resist making the Vanguard seem ultra-tall.

To paint my vanguard, I simply used my normal marine painting list:
1. Prime blackgesso.
1a. Drybrush Base with Astromican Grey, Fortress Grey, Skull White.
2. Drybrush all armor Mordian Blue
3. Drybrush all armor Ultramarines blue
4. Wash all armor with asurman blue
5. Basecoat scrolls, chest eagles, tabards etc with Astronomicon Grey
6. Basecoat guns, chains, metal bits Chaos Black
7. Highlight Grey with Fortress Grey
8. Wash Grey with Badab Black
9. Drybrush boltgun/chains with Boltgun metal
10. Drybrush bling with Shining Gold
11. Highlight Grey with Skull White
12. Highlight bling with Mithril Silver
13. Wash bling with Devlan Mud
14. Wash Bolters/Chains with Badab Black
15. Paint Fists, Seals w/ Mecharite Red
16. Wash red with Devlan Mud
17. Highlight with Blood Red
18. Eyes, jade, ivy w/ Dark Angels Green
19. Highlight with Goblin Green
20. Highlight with Scorpion Green

Creating a painting list helps me stay focused and it turns painting into a simple paint by the numbers recipe. One thing that always happened to me before I started using painting lists was that I'd constantly have to go back and open a color I used the day before cause I missed a spot. Then I'd notice on a different model I missed another spot in a different color and so on. By following a list, I now take the time to check the the entire squad before I move on to the next step. It also makes touch ups easy too since I know what colors I used and at what step I paused to do touch ups at.

Another nifty side effect of having a list is clean-up/storage of my painting kit (I should put this up at some point). Since I live in a tiny apartment, I need to make sure I can set up to paint and clean up quickly before I go to bed. My painting kit is easy to assemble and transport when I have the recipe in hand. I bring it out to the coffee table, paint and put it away when I'm done!

Right now, I stopped my Vanguard at step 8. Tonight I hope to do the rest OR I'll finish basing my command squad. I might also decide to assemble my vindicator or the rest of my sternguard. Depends on what my mood is tonight. I'll try to get up pics of my WIP: Vanguard tonight or tomorrow!

Monday, April 6, 2009

WIP: CF Sternguard


Sternguard WIP

My April Challenge list calls for 6 sternguard. I own the metal set, but I decided to use one of those guards as a Sgt in a tactical squad so that left me with 4 metal SGs. I didn't want to buy another set so I thought I'd try my hand at creating plastic sternguard marines. Kantor Base asked for ideas on converting plastic tacticals into Sternguard, so I felt inspired to try!

The first guard above is simply made. Weemen has a very simple and elegant tutorial on turning bolters into Sternguard bolters. I was pleasantly surprised at how easy it was. And unhappy that I can't seem to find a single scope in any of my bits boxes! I'll need to grub a pair of them from friends before I can paint them!

For the leg band, I cut some thin plasticard into a strip and dabbed a tiny bit of zap-a-gap on one end. I then wrapped the plastic card all the way around the leg adding tiny drops of zap-a-gap (I used a tooth pick to dip and apply) to hold in place. Once I got all the way around, I cut the card and glued the final end on. I'm going to add white glue rivets following Santa Cruz's tutorial and use a pin to make really small ones.
Sternguard WIP


Sternguard WIP
I notice now I forgot to do some clean up on both these minis. I'll get it done while I wait on those scopes. Suggestions are appreciated! I haven't yet glued these guys.