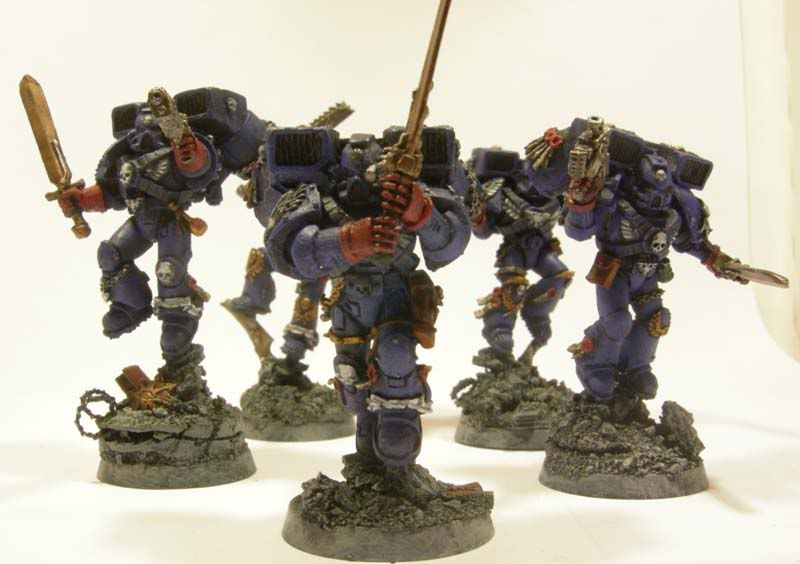
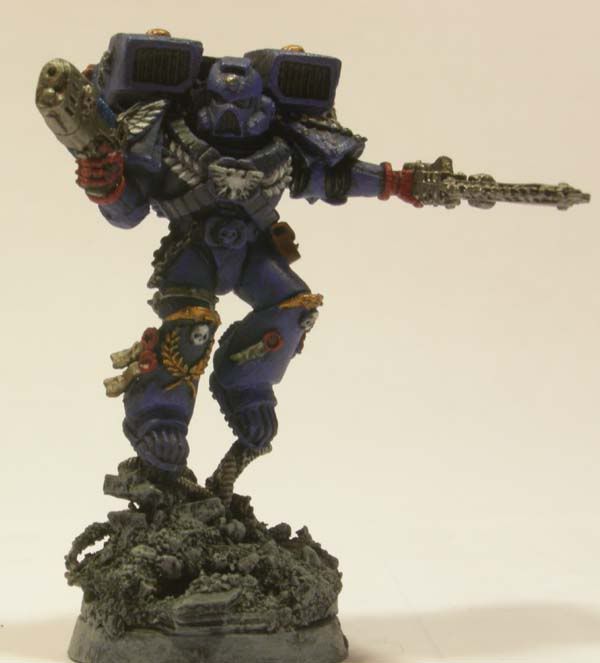
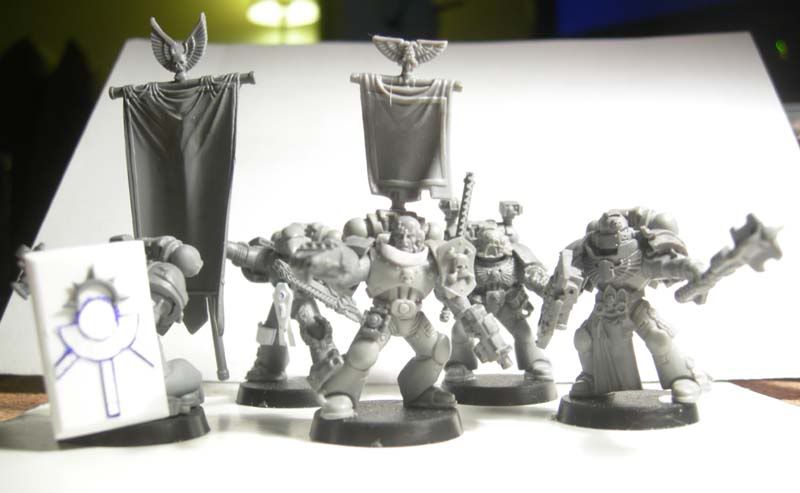
Monday, April 27, 2009

Back in the Synapse Again


Last night I took all my Tyranids out and took inventory. The shiny new Space Marine codex distracted me from the Hive, but now I return. The image shown is the only guy who's fully painted. I have a good number of them either base-coasted or just primed.

Here's my 1500pt list which I'll later color-code in the Cawshis style:

HQ
Hive Tyrant - 186
[Talons, Toxin Sacs, Winged, Warpfield, Ad. Glands (+WS), Flesh Hooks]

Elite
6 Tyranid Warriors - 199
[talons, extended carapace, toxin sacs, barbed strangler, 5 x deathspitter]

Troops
8 Genestealers - 160
[feeder tendrils, scuttlers, flesh hooks]

18 Termagaunts - 108

18 Termagaunts - 108

15 Hormagaunts - 180
[toxin sacs]

Fast Attack
3 Sporemine - 45
[bio-acid]

3 Sporemine - 45
[bio-acid]

Heavy Support
Carnifex - 163
[Barbed Strangler, Venom Cannon, Enhanced Senses, Reinforced Chitin]

Carnifex - 128
[Barbed Strangler, Scything Talons, Reinforced Chitin]

3 Zoans - 165
[Synapse, Psychic Scream ]

I was worried when I switched over to Space Marines that I would only end up with 2 half-painted armies, but with over 1500pt of Marines done -- I feel very confident that this army will come together easily.

Wednesday, April 22, 2009

April Update and Army List for Saturday

Both work and inertia have conspired against me to make the April Challenge goal truly a challenge! With only 7 full days and a single (packed) weekend left, it's going to be tough to get it all done! Last night, I flocked and primed my Command squad, Sternguard and Pedro Kantor. One amazing thing about using gesso is the speed with which I can prime my models. Before, when I used to spray-prime, I'd force myself to wait until I had 30+models or lots of vehicles to spray…it made crawling out onto the (apartment) fire escape and angering the wife worth it. Now I can prime as soon as the flock is dry! If only it were this easy to get the painting done.

I have a game coming up this Saturday against Falgrim's DIY marines, "The Sigmar's Pride." They are modeled after the Space Wolves (instead using lions) but are using the SM:Codex at the moment. So it'll be a straight SM v SM codex fight @ 1750 points.

Here's the list I'm planning (and it makes me so happy they are all painted…if not quite WYSIWYG!) @ exactly 1750 points:
HQ: Captain in Termie Armor
Elites: 5 Tactical Terminators w/ Assault Cannon
Elites: 1 Dreadnaught w/ Drop Pod, Locator Beacon
Troops: 10 Tacticals, Melta, LasCan, Power Fist, Rhino
Fst Att: 5 Vanguard Marines w/ Jump Packs, 2 Power Wpns, 2 Plas Pistols, Relic Blade
Hvy Sup: Land Raider Crusader
Hvy Sup: 5 Devastators w/ 2 PlasCan

The dreadnaughts, LRC and Rhinos w/ Tacticals make up the fast moving bulk of my attack force. Since 1 dread can deep strike in the first turn, the hope is that I can land, pop something large in the rear armor (like a vindicator or land raider with the MM) and then divert some marines to deal with him (though dreads do pop easy!). My LRC w/ termies will advance on any objective/easy kp supported by the tacticals in rhinos…in case any speeders or bikes with meltas show up. The Devs are there to (hopefully) pop rhinos or break up marine formations (plasma is nasty!). Finally the Vanguard can work as either an anti-assault force or a final objective contester. With the 2 locator beacons, I'm hoping that a Heroic Intervention isn't impossible. Being able to deep strike and then charge would be awesome (though I haven't had much luck with the Vanguard so far…costs as much as termies…die much faster! Nifty models though!).

Any thoughts? I don't have much time to build any new models, but I have a vindicator, razorback, command squad and the SG/Kantor models primed. Also a lot of Dark Angels…since I don't mind fielding a mixed list as long as they are all marines. Any suggestions?

Depending on how I do, this is probably my last game with the Crimson Fists for a little while. I've been meaning to get back into my Tau and with an apocalypse game planned for July, I think now is the best time! Expect more posts on the Apocalypse planning in May once the April Challenge is up. I also plan on starting up a May Challenge as well!

Tuesday, April 21, 2009

WIP: Vulcan Clone

When I started the Skull Bashers, I wanted to go in the opposite direction of my Tyranids. I wanted tanks, good saves, templates and low AP weapons. 

Six rhino chassis later, I'm working on the rest.

Vulcan really stood out in making flamers, melta and Assault Terminators extra dangerous. I was banking on the rumors of a model for him being true. The good thing is that there is a model for him coming out soon the bad thing: it's not my style. It's too busy and I don't like the idea of him throwing his spear.

So, I'm building my own model. It's the Commander chest and legs, with the Standard Bearer's pole turned into a relic blade with the help of some plasticcard and part of a hunter-killer launcher. The Gauntlet is a lighting claw with plastic tubing and plasticcard.

Still to do:
  • add some plasticcard on the legs to make the armor look different
  • custom backpack 
  • scaled mantle
Thoughts? Anyone else doing a Vulcan conversion?

Monday, April 20, 2009

Introducing A New Poster: AaronB!

My good friend AaronB has joined Adepticus Prime as a second author. He currently has two armies he is working on: A DIY SM chapter called the Skull Bashers and a Tyranid army. I've played several games against him (you can read our first marine vs. marine BR here.) and he's one cool guy.

I'll let him do a more formal introduction on his own, but I just want to say I'm glad to have him blogging with me as he's got mad skillz (as the kids would say) when it comes to painting and scratchbuilding units!

I mean...check out his Legion of the Damned converted marines. He made them to fit into the near-heretical fluff associated with this Skull Bashers! Essentially, his chapter of marines are supported by undead marines that are ushered into existence by the chaplains.

Burn the heretics, I say!


Please welcome him aboard!

Saturday, April 18, 2009

Crimson Fist Vanguard


Big progress this week! With only 10 days left in April, I have a pathetic 15/67 points completed. But I'm not giving up! I finished my LRC (pics to come) today and my Vanguard. My Vindicator, Razorback and Sternguard have been assembled along with my Command Squad and Kantor.

That means I have 32 points ready for undercoating and 20 points (Drop Pods) ready for detailing. I don't know what's blocking me from just finishing those damn pods, but I'm determined to get them done this week!

Back to the Vanguard, I went a little crazy detailing the bases as I wanted them to be taller than the average model. I used cork to build up the height of the base and tossed in some bits to get it nice and rubble-ly. The Vanguard are neat in that they also have their own bits on the metal bases! As these are my Crimson Fists, these guys are all about getting them ready for the tabletop. They're also about trying out new techniques I see online. It's going to make for a healthy variation, but I think that's okay. The Chapter is rebuilding, right? Only makes sense that the servitors assigned to painting the marine armor get better too!

For my two power weapon equipped VG, I tried the Painting Corps tip of using Sepia wash on bolt-gun metal to get a nice Ancient-Gold color. I figured I'd give it a try! I like the ancient gold look, but I don't know if it's the best look for marine weapons. Or is it? I can't decide really, but at least my Vanguard will be consistently geared with ancient power-swords!

I'll try and get up my LRC next. My friends and I are trying to put together an apocalypse game in July, so instead of taking pictures today, I tried building a massive power station with Orbital gun piece of terrain. It's way-too WIP to post, but I'll put up those pics later. I think May-June are looking like "Prepare for Apocalypse" months. Which is good! I need a distraction from the Imperial Guard overpowered codex (I flipped though it at my FLGS. Madness!)!

Thanks for looking!

Thursday, April 16, 2009

Reader Request Day 2

Tau Forces march thru the ruins of an Imperial City

As mentioned in my last post, I had two more large buildings I wanted to show off. Both of these buildings I constructed together as a pair, using foamcore, balsa wood, coffee stirrers and modelling clay to add in all the nifty details.

First up are the WIP shots of a 4 story building, fortified with a few sandbags on the top floor. I offer up the WIP shots so you can see the bits and stuff used. Cardboard for the corner details, wood for the flooring and lots of foamcore!

Up next are the painted versions and some detail shots. I'll admit I'm not the best photographer and taking pictures of terrain is tougher as I can never get the lighting right on the big pieces. If you've got any advice on snapping shots of terrain, I'd be happy to read them!

I learned a lot from my first batch of buildings and applied the lessons to these buildings.
  1. Leave space on the floors for larger based models.
  2. Don't clutter up the bottom floors too much. Less is more for ruined buildings you want to play on!
  3. When painting terrain, drybrushing is your best friend.
WIP shots of my next building: My attempt at a "fortified" building for Cities of Death. I simply boarded up the windows! I guess the sandbags on the previous building might also quality it as fortified...so that's potentially 2 fortified buildings for my table.


And now the painted shots!

Thanks for looking! I hope these pieces inspire you to make your own city terrain! I really found a love of making terrain with this city fight project...and indeed the hobby. There is really nothing like defending your DIY ruined city with your freshly painted marines in 40k. It's why the hobby is one I've stuck with for so long!

Wednesday, April 15, 2009

Reader Request Day 1

In my post "Setting up the Battlefield," Col. Corbane requested some more pictures of my terrain in the comments. As I am a slave to my few readers, I'm always happy to oblige a simple request like this!

All of my pieces are pretty much foamcore, cardboard, glue and bits/rubble. I used MDF boards as the base for all of the pieces. Some of the pieces were made using old GW templates that were available for download...while others were made using my own templates.

First up is my very first building...a ruined Cathedral. When designing it, I thought it'd be neat to construct a building that could be broken up on the battlefield if need be:
My second building was a little more complicated, if a bit smaller. As these were my first terrain pieces, I tried new things with each piece. The cathedral was very simply painted, with only a single color (Shadow Grey) as base and then successive lighter dry-brushed highlights.
I tried a two-color paint scheme and used a little bit of cardboard for detailing. I also laid down some flooring using wooden stirrers for detail and painted the rubble using different colors. For my third structure, I went a little crazy, adding in more detail and way too much rubble. I also made the floors a little too small. Only normal troops can stand on them!

You can probably see that the rubble is a little too dense. Regular troopers fall over on it and forget placing a metal model in that rubble...it'll never keep it's balance! I love this building, but it nearly always gets called "dangerous terrain" in my games.
Here's a work in progress shot:
One more building was made with this "batch" of City Terrain. I wanted to try a different color scheme and settled on a blue/brown scheme. I don't really like it, but I'm really proud of the shape of the building and it looks great on the table...just not the best colors. On this piece, I also added a little bit too much rubble...and the floors are just barely capable of providing enough footing to a large-based unit like a Tau Broadside Suit.

After finishing these buildings, I took a break for a few months to work on finishing up my Tau army (which I never finished). I then decided that I needed 2 more massive buildings and a few smaller rubble piles. I'll post them up next post. I took a few more WIP shots of my 2nd gen buildings, so I'm trying to avoid letting this post get too long. It's also sort of a neat look at how much I've improved in city terrain creation!

Any thoughts, comments, questions or suggestions for new pieces are appreciated! Thanks for looking.

Thursday, April 9, 2009

April Challenge: Nearly half over.

With 14 days passed, I thought I'd update interested parties on where I stand. I recently added a color-coded list to my sidebar to keep track of what I'm working on and what I have left to do for April. I maintain the list in Excel normally so that I can review it when ever I paint (I'm a nerd, I know!).

At this point, I have finished the Vanguard and working on detailing up the LRC. I apologize for the lack of pictures, but I haven't had a chance to snap any yet. Busy work week and taking the time to snap a pic seems crazy when I need to paint!

I'll have to admit to being slightly behind where I thought I'd be and a lot of that has to do with being lazy. Many a night instead of painting, I'll watch tv or play World of Warcraft. I'd like to blame work, but I've only worked late a few nights. I'm going to need to step it up if I hope to get 57 painting points this month!

Here's my new battle plan:
Finish Painting LRC
Finish Painting Drop Pods
Flock/Undercoat Command Squad
Paint Command Squad
Assemble Vindicator/Razorback
Undercoat Vindicator/Razorback
Paint Vindicator/Razorback
Assemble Sternguard/Pedro Kantor
Flock/Undercoat Sternguard/Pedro
Paint Sternguard/Pedro

I think knocking out the LRC and the Drop Pods will keep me feeling good about painting (since I'm actually getting this done!). Then moving on to the command squad. I like the rhythm of painting 5-10 troopers then doing a vehicle or two. Then back. I think it prevents me from getting overwhelmed by all the troopers I have waiting for me!

Eek, over at Heroes of Armageddon, created an awesome chart to help track his progress on his Salamander Battle Company. I may have to figure out a way to steal it and post it in the side bar instead of my lame color-coded text box. It's pretty damn cool, so check it out.

Painting List and April Challenge Progress

A quick picture-less update.

I've assembled and primed my Crimson Fist Vanguard marines. With these marines, I didn't convert anything, they are straight out of the box as I find converting metal models to usually be kind of intimidating. All the packs and arms are pinned and in the case of the relic-blade equipped marine, I left the arm off until I can get the face painted. I built up somewhat excessive bases (pics to come, I promise), but I couldn't resist making the Vanguard seem ultra-tall.

To paint my vanguard, I simply used my normal marine painting list:
1. Prime blackgesso.
1a. Drybrush Base with Astromican Grey, Fortress Grey, Skull White.
2. Drybrush all armor Mordian Blue
3. Drybrush all armor Ultramarines blue
4. Wash all armor with asurman blue
5. Basecoat scrolls, chest eagles, tabards etc with Astronomicon Grey
6. Basecoat guns, chains, metal bits Chaos Black
7. Highlight Grey with Fortress Grey
8. Wash Grey with Badab Black
9. Drybrush boltgun/chains with Boltgun metal
10. Drybrush bling with Shining Gold
11. Highlight Grey with Skull White
12. Highlight bling with Mithril Silver
13. Wash bling with Devlan Mud
14. Wash Bolters/Chains with Badab Black
15. Paint Fists, Seals w/ Mecharite Red
16. Wash red with Devlan Mud
17. Highlight with Blood Red
18. Eyes, jade, ivy w/ Dark Angels Green
19. Highlight with Goblin Green
20. Highlight with Scorpion Green

Creating a painting list helps me stay focused and it turns painting into a simple paint by the numbers recipe. One thing that always happened to me before I started using painting lists was that I'd constantly have to go back and open a color I used the day before cause I missed a spot. Then I'd notice on a different model I missed another spot in a different color and so on. By following a list, I now take the time to check the the entire squad before I move on to the next step. It also makes touch ups easy too since I know what colors I used and at what step I paused to do touch ups at.

Another nifty side effect of having a list is clean-up/storage of my painting kit (I should put this up at some point). Since I live in a tiny apartment, I need to make sure I can set up to paint and clean up quickly before I go to bed. My painting kit is easy to assemble and transport when I have the recipe in hand. I bring it out to the coffee table, paint and put it away when I'm done!

Right now, I stopped my Vanguard at step 8. Tonight I hope to do the rest OR I'll finish basing my command squad. I might also decide to assemble my vindicator or the rest of my sternguard. Depends on what my mood is tonight. I'll try to get up pics of my WIP: Vanguard tonight or tomorrow!

Monday, April 6, 2009

WIP: CF Sternguard


Sternguard WIP

My April Challenge list calls for 6 sternguard. I own the metal set, but I decided to use one of those guards as a Sgt in a tactical squad so that left me with 4 metal SGs. I didn't want to buy another set so I thought I'd try my hand at creating plastic sternguard marines. Kantor Base asked for ideas on converting plastic tacticals into Sternguard, so I felt inspired to try!

The first guard above is simply made. Weemen has a very simple and elegant tutorial on turning bolters into Sternguard bolters. I was pleasantly surprised at how easy it was. And unhappy that I can't seem to find a single scope in any of my bits boxes! I'll need to grub a pair of them from friends before I can paint them!

For the leg band, I cut some thin plasticard into a strip and dabbed a tiny bit of zap-a-gap on one end. I then wrapped the plastic card all the way around the leg adding tiny drops of zap-a-gap (I used a tooth pick to dip and apply) to hold in place. Once I got all the way around, I cut the card and glued the final end on. I'm going to add white glue rivets following Santa Cruz's tutorial and use a pin to make really small ones.
Sternguard WIP


Sternguard WIP
I notice now I forgot to do some clean up on both these minis. I'll get it done while I wait on those scopes. Suggestions are appreciated! I haven't yet glued these guys.

Friday, April 3, 2009

WIP: CF Command Squad

Crimson Fist Command Squad
I've just finished my command squad and I'm fairly happy with the way they turned out. I wanted to practice some simple conversions and since my Crimson Fists are all about getting them on the tabletop as soon as possible, I'm not super concerned with achieving perfection. They're my practice army.*

All my pics should be clickable for the larger versions!
Powerfist Veteran
Veteran with Power Fist
I wanted this Veteran to look capable of leading a squad or fit into a non-jump pack Vanguard unit, so I gave him some bits from various sets. For the neck-armor, I used index card cut to fit and then sealed it with white glue to stiffen it up. I used this method before with my devastator Sgt., and it worked out pretty well.
WIP,Crimson Fists
Completed Devastator Sgt with Neck-Armor

Storm Shield Veteran
Veteran with deluxe storm shield
For my veteran with a storm shield (who can say no to 3+ invulnerable saves?), I wanted to make a massive tower shield. This veteran uses his shield to protect the squad! I made it out of plastic card the I carefully heated to bend around the shaft of a fat pen. Then I detailed it using index card and a bit from a servo-skull. I think I need to add rivets and maybe something a bit more to really complete the shield. Any ideas?

CF Bannerguard
Bannerman with plastic card.
Again, I wanted to practice with plasticard, so I made this bannerman a piece of groin-armor. It's different thicknesses of plasticard. I plan to paint the hanging bits as scrolls. The banner is pinned on so I can paint it separately (and turn it around for pictures!). I need to add some weight to this guy because he tends to tip over with all that weight on the banner.

CF Champion
Company Champion front

CF Champion
Company Champion back
No major conversions on the company champion except I used a Dark Angels power-mace instead of the sword. I like the mace better from the Crimson Fists...for no good reason. I plan to use the blade as a relic blade for the eventual Honor Guard anyway. I clipped the DA symbol and replaced with Terminator armors. I might add some leg-braces or armor, but I'm undecided on whether he needs more detail or not.

I didn't snap a separate shot of my Apothecary since I really didn't do much with him. He's a standard apothecary model out of the plastic box. I might have used the wrong head though as now that I look at my remaining bits, I see the apothecary head right here. I think I grabbed a captain's head. Makes him slightly different I guess!

Any comments or suggestions would be appreciated. I'll probably be painting the squad over the next week or so.

Wednesday, April 1, 2009

April Goal: 1250pts of Crimson Fists

I know I said in a previous post I was going back to Deathwing, but I took out some DW termies over the weekend and wasn't feeling it. Instead, I felt inspired to work on my CF LRC and plan out a command squad. So, for the month of April, I've set a challenge to myself to paint 1250 points of Crimson Fist Marines in the 30 days of April (in the parlance of the 40k blogs, I think that's 57 points by Lone Pilgrim's method). It's ambitious considering how slow I normally paint (it took me 5 months to get my Crimson Fists to 1750!), but I think if I set the goal it'll at least encourage me to get it done! At the very least, at the end of the month, I can claim this was an elaborate April Fool's Joke on myself. Getting 1250 points done in 4 weeks! Haha!

Here's the planned list to add to my completed 1750 points list (seen here in a prior BR). I've started a few of the models already, so I've got a bit of a headstart going into April (+1 for Cheating!):

HQ- (420 points, 6 painting points)
Pedro Kantor
Command Squad:
-Veteran w/ Company Banner
-Apothecary
-Veteran w/ Storm Shield, Combi-Flamer
-Veteran w/ Powerfist
-Company Champion w/ Combat Shield, Power Weapon
Razorback w/ Hvy Bolter

Elites (220 points, 26 painting points)
6 Sternguard
Drop Pod
Drop Pod*
(*extra drop pod is to have a transport option in future games for dreads)

Fast Attack (250 points, 5 painting points)
5 Vanguard w/ Jump Packs
-Relic Blade
-Power Weapon w/ Plasma Pistol
-Power Weapon
-Plasma Pistol
-Normal

Heavy Support (360 points, 20 painting points)
Land Raider Crusader
Vindicator

It's a small list of only 17 minis and 4 vehicles (a testament to how much Space Marines elites can rack up the points!) which I know doesn't seem so ambitious, but I have multiple conversions planned for both the Command squad and the Sternguard. I want members of the Command Squad to also be able to function as Honor Guard or Vanguard squad members, so it's going to take some careful planning to make this work (and maybe magnets!). Also two of the Sternguard are going to converted from plastic marines and I've got very elaborate armor plan for the two of them. Alongside this, I want to get those objectives done by May as well. So there's a lot of work being put On The Bench!

I'm excited for this challenge as it'll get my Fists up to 3000 points (though I have 4 elites, so I'll need to figure out a new unit to squeeze into that 105 points remaining…I'm considering filling out the normal 5 man Assault Squad) and this second stage of the list will really test my skills in assembling, converting and painting in a rapid fashion!

Do you set painting goals similar to this? How do you plan your painting goals? What are your plans for painting before the Imperial Guard are released?