Thursday, March 18, 2010

New(ish) Blog: Terrain From Junk!

We interrupt my 40 days of painting updates (or nonupdates as the case maybe) to pimp a blog I hope gets alot more views and pictures:  Terrain From Junk (associated with Tristan, author for GWPertinent).  It provides snapshots of terrain made from the junk around your house and I think it's brilliant!

I respectfully submit my own junk piece (unpainted, but to those familiar with my blog, this should come as no surprise!)...the Random Industrial building turned into a last-stand base.  It was created from the humble packaging for my new printer (or really old printer at this point!):
Glorious junk, right?  Endless possibilities!  I used cereal box cardboard, lots of bits, some plasticard and clay-filler and produced a work of WONDER!  Okay.  Maybe not wonder.  But definitely serviceable as some front-line bunker or cheap-o bastion.


I used bendy straws and wire mesh for the pipe system.  One of the delays I have in painting it is that I've been meaning to pick up water effects to put down there, but I haven't gotten around to it yet.

Check out Tristan's new blog!  Send in images for inspiration!  With the unending number of terrain kits GW has been releasing, I've been missing the DIY folks that turn junk into terrain!  I yearn for the days of WDs filled with coffee can terrain pieces and deodorant-container tanks! 

Wednesday, March 17, 2010

WIP Jump Pack Captain

note: This guy has been primed and painted already, but I wanted to show a WIP shot.
As I've become obsessed with Planetstrike games, I decided that I needed a Captain equipped with a Jump Pack to better support my assault/counter assault elements (both my 2000 points defender/attacker lists now have Jump Pack Marines).  I didn't want to spend a million points on him, so I gave him the basics:  Jump Pack, Power Weapon and a Melta Bomb.

Some very minor conversions went into this guy:  I cut down the hip plates from a Terminator Assault set and had to place a spacer on his Jump pack to fit in the Iron Halo.  If I do the hip plates again (and I will as I kind of like them!), I'll probably fit in some sort of spacer to lift them up slightly from the armor.  They look a bit off...or that could just be me.

I heavily decorated the Jump Pack as I wanted the Captain to be able to fit in with the bling-laden Vanguard and still stand out.  I think the seals and base will help in that regard. The base I received in a trade via Santa Cruz Warhammer Barter Bucket. I traded my OOP Imperial Guard along with an Imperial Guard on a bike for metal scouts, and Mike was awesome enough to toss in a few resin bases. It adds a great amount of height to the Captain and will be fun to paint I think.

I'm pretty sure the seals were from the Ravenwing set.  I love that set just for the seals! On the top of the jump pack, I wanted to add some more bling (pimp my jump pack!), so I shaved down a pair of matching Terminator honors bits as far as I could manage and glued them on.  If I had more skill (and time) to work with green stuff, I'd probably had been better served going that route.  But I'm happy with the way it turned out.

I wish my pics weren't so dark.  Taking pics while working isn't easy.  Do you folks have a photobox set up that is quick to turnaround?  Often, I'm snapping a pic under a lamp and trying my best to clean it up on Photoshop (my skills there a limited as well). My challenge is that I live in a NYC apartment that has nearly no space to permanently set up a photobox/lamp set up...so I make do with my work lamp on the coffee table so I can get something up.  Perhaps it's a setting on the camera I can fiddle with...is there any setting that'll take brighter pictures despite crappy lighting?

Coming up:  Finished Captain, Basing 101 and a 10 man Assault Squad!

Sunday, March 14, 2010

Basing: Not Another Tutorial Part 1


There are probably hundreds, if not thousands, of basing tutorials on the web.  Ron, over at From the Warp, has probably the simplest tutorial out there...add glue to base, dip in sand!  Weemen extends Ron's 2 steps out to 10 in an easy to read and follow fashion.  The talented folks over at Santa Cruz Warhammer not only expanded on Ron's simple format, they also introduced grass and a self-made nifty wash to it.

So, as I say in the title...this is not another tutorial.  More talented folks have created tutorials for you to follow and use. In that linked post from Santa Cruz, they had a contest at the end that involved them sending some basing materials to a lucky winners.  The only requirements...write a quick review.  I sent John my review ages ago, but I still owned the blog a review. Here it is in the simplest and easiest form...and just in time for 40 Days of Painting!

First up, superglue a rock to the base...Santa Cruz (SC)'s kit came with a bin of slate that was perfect for my bases. Glue it anywhere you think it looks nifty. Don't over think it!  Only warning:  Try not to make it impossible to paint the model's feet!


Second up, add white glue.  I just put 2-3 drops on the base and use a toothpick to spread around.  Third, dip in your sand mixture.  In the past I used a gravel-like mix for my models.  Santa Cruz sent me a nice sandy mixture...it's the same mix they used in their tutorial.  It sticks quick and then I just let it dry overnight.


Prime it!  I prime my models using Gesso.  I never liked the spray paints despite the speed and living in an apartment building makes it tough to "go outside" and spray.  Besides that, priming with gesso allows me to really look at my models and mentally take note of all those details I may not have noticed before.  Hand-priming, for me, has really improved my painting habits.  Here's a pic of the brand I use.

I use one brush for the base and different one for the model when priming.  I've learned through trial and error that using the same brush means you get a bit of base material stuck to your model and that you'll need to remove the gunk later...learn from my failures! 

I then leave this to dry overnight! Stay tuned for the painting steps I take in part 2!
40 Days of Painting Status Update:   
26 days left...9 points complete.  That's 6 Sternguard, 5 Assault Marines and 1 Captain.  I think I'm going to do Rhinoes next just to increase my score to respectable levels.  Low hanging Fruit FTW!

Saturday, March 13, 2010

40 Days of Painting: Sternguard

Finally putting up some pics!  With 12 days past, I'm sad to admit that I only have 8 points fully painted...the Sternguard ate up a lot more of my time than I'd like to admit.  But hopefully I can make up time on the easier Tactical Marines and Rhinos!

I originally posted regarding my Sternguard a really long time ago. Back then, I had 4 of the splendid metal models to paint and 2 converted models.  I primed them and basecoated them a long time ago and then got lazy for a bit. No more, I say!  No More!

Being the obsessive guy that I am, I couldn't paint them with their bolters blocking all that chest detail, so while they are WIP, the arms are painted separately!  I didn't take a shot prior to this, but from here I had a bunch of steps...lots of details to cover (especially the bling) and highlights to add.

As I post these pics, I can see I missed a tiny detail here and there that I'll need to go back and finish up.  And I may consider highlighting the bling some more as they don't so much look "Shining Gold" as "Dull Brass" at the moment.  Any veteran out there knows what colors I used.  I like my crimson fist bolters to look all metal...as they would need to be cast quick and efficiently to rearm the chapter.  Also, these guys are all about table-ready...so it saves me lots of time considering how many marines I'll have equipped with bolters!

The converted marines are fairly easy to spot, I think.  They do fit in well with the rest of the sternguard, but I think for future converts, I'm going to ensure they have bolter straps and maybe a bit more bling.  And Skulls on their helmets!  I didn't notice that nearly all of the metal sterns have skulls on their helmets.

I'll be posting more as I go.  Lots of pictures...but lots more painting to do!  If it wasn't for the last minute, I'd never get anything done

40 Days of Painting Status Update:   
28 days left...8 points complete.  I'm way behind where I need to be!.

Tuesday, March 2, 2010

40 Days of Painting: Random Thoughts

So without realizing it, the minis I pulled off the shelf for this contest could totally amount to a modest 1030 point army!

HQ (300 Points)
Captain with Jump Pack, Power Sword, Meltabomb
Captain with Terminator Armor and ChainFist

Elite (155 points)
6 Sternguard, 1 Combi-Melta

Troops (465 points)
10 Tacticals, Powerfist, Meltagun, Missile Launcher, Rhino
10 Tacticals, Plasma Pistol, Plasma Gun, Heavy Bolter, Rhino

Fast Attack (110 Points)
5 Assault Marines with Jump Pack, Flamer

It isn't the worst list in the world for a 1000 point game.  A solid Troop core with an ability to tackle various unit types (Plasma on the MEQs, HB on swarms...Power Fist for Dreads) loaded in Rhinos and supported by 2 ICs and a Jump squad.  I guess I'd march that Terminator Captain around the board as he'll be the slowest model out there...or use him as a counter-assaulter to support a HB or ML combat squad.

The Jump Pack Captain will support the Jump Pack marines and break up small enemy units or last-turn objective contest.  I feel like the list is a bit naked without some sort of tank, like the cheap predator...but I wouldn't be adverse to playing with this list.

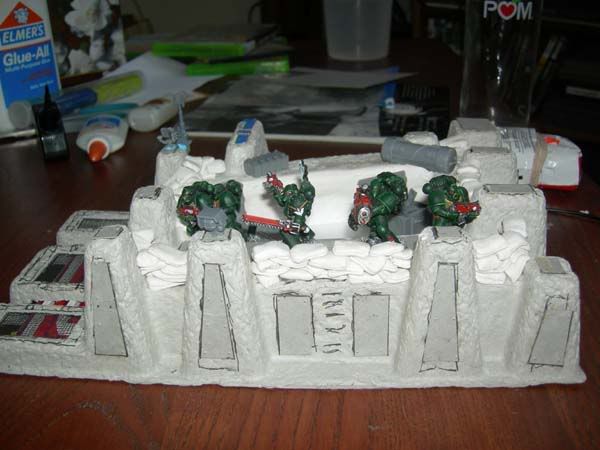
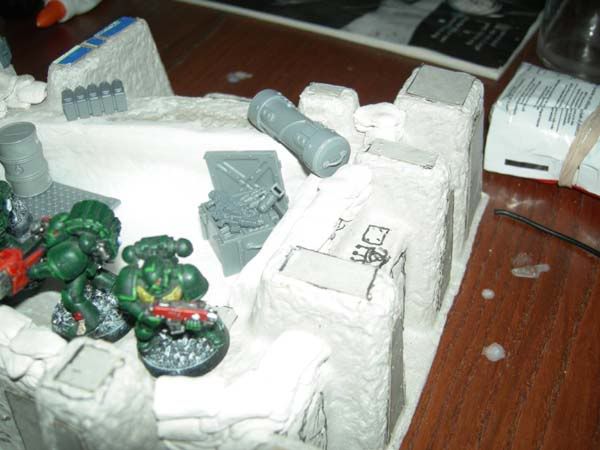
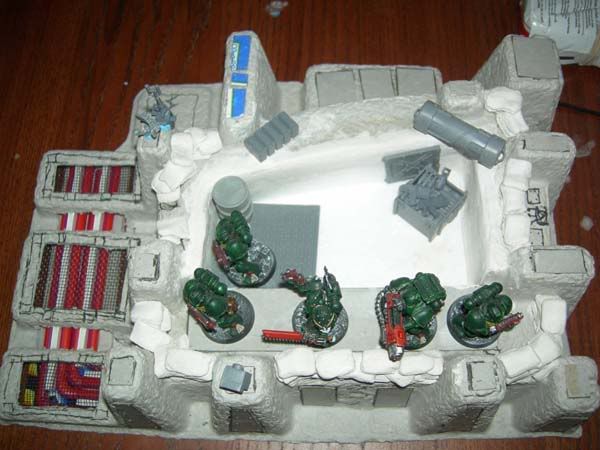
Might even be fun in a Planetstrike game as the defenders!

How do you decide what you're going to paint?  Is it what tickles your fancy?  Is it that neat conversion that you just have to paint?  Or do you paint in blocks of required units?  I usually paint in blocks of units I want to try out.  This time around I just grabbed what I had assembled just to finally get them done.  We'll see how that works out for me.  I have a lot of other minis I should "just get done..." many of which you've seen right here on this blog (Dark Angels, Tau, etc!).

What do you have on your shelf that you just need to get done but you haven't been inspired to pull down and paint?

40 Days of Painting Status Update:   
39 days left...all models are now primed and ready for base work.

Monday, March 1, 2010

I'm back and 40 days of Painting ahead!

So after a too long hiatus, I'm back. I could post a litany of excuses...work, life, laziness, etc...but suffice it to say, I've missed posting and been aching to get back to it.

Over at NerdNYC, I've entered into a "contest" of sorts.  We're all putting some money in a pot and the challenge is simple:  40 points worth of minis in 40 days.  I have lots of minis just sitting on the shelf, assembled and unpainted, so I pulled a bunch down and I've decided to get these done!

 Thirteen points:  2 Rhinos (5 each) and 6 Sternguard at 1/2 point each (since I've already started them).


Twenty-seven points. 5 Assault marines...one of which is a very old assault marine equipped with a very old hand flamer (which is simply a flamer in play).  Terminator with Chainfist and 20 Tactical Marines.  A lot of these guys are older Metal models with newer arms and bolters (though some have old bolters too!).  I really emptied my "old bits" box to assemble these guys and I'm happy with how they turned out. Lastly, I made a Jump-Pack equipped Captain using various bits from various sets.  He's been put on a resin (I think!) base I received in a trade not long ago.  I wanted this Captain to stand out a bit and also be about the same height as my Vanguard and the resin base was perfect for it.

I made some minor conversions here and there and I'll try to highlight them in the future as I paint up the models. I'm excited to be back painting and modeling again!  Stay tuned (for more regular posting!).